I first learned the figure skating warmup pattern referred to as the Champion’s Lap when I attended the Janet Champion Spin Clinic in the fall of 2022. See my blog post dated May 14, 2023 for a review of the clinic. After the clinic some of the attendees, including many of my fellow adult skater friends, were trying to remember and recreate the Champion’s Lap. In this post I do a deep dive into the Champion’s Lap, breaking down the finer points. I share a video of me practicing the Champion’s Lap and include an explanation of the individual steps. I also provide guidance on how to accentuate and complete each step with control and finesse, rendering a simple and basic pattern not only an effective warmup, but a truly beautiful and exceptional choreographic sequence all on its own. I should note that the origin of the pattern’s name does not have to do with Janet Champion. This is a coincidence. I am still trying to figure out the origin of the name, so if anyone knows, please send me a comment! After searching the internet, I believe the pattern may also be referred to as champion’s stroking.
The steps of the pattern when skating counter-clockwise around the rink, as I demonstrate above in the video, are as follows: two forward crossovers (forward crossover – forward crossover) – step onto left forward inside edge and hold for a brief glide (extend the free leg) – mohawk turn (you are now skating backward after the mohawk) – side step wide onto right backward inside edge and hold for a brief glide – backward crossover – step onto left forward outside edge (you are now skating forward) and hold for a brief glide (extend the free leg) – mohawk turn (you are now skating backward after the mohawk) – two backward crossovers (backward crossover – backward crossover; I did just one in the video because I was skating the pattern on a smaller rink) – and then complete the pattern in a backward landing position glide on the right backward outside edge, with the head looking to the right. Thank you to my friend Ruth for recording me as I skated the pattern! And a silly note… I wear padding over my tailbone when I practice, just in case I fall. Thus, I look a bit thicker than usual in the video!
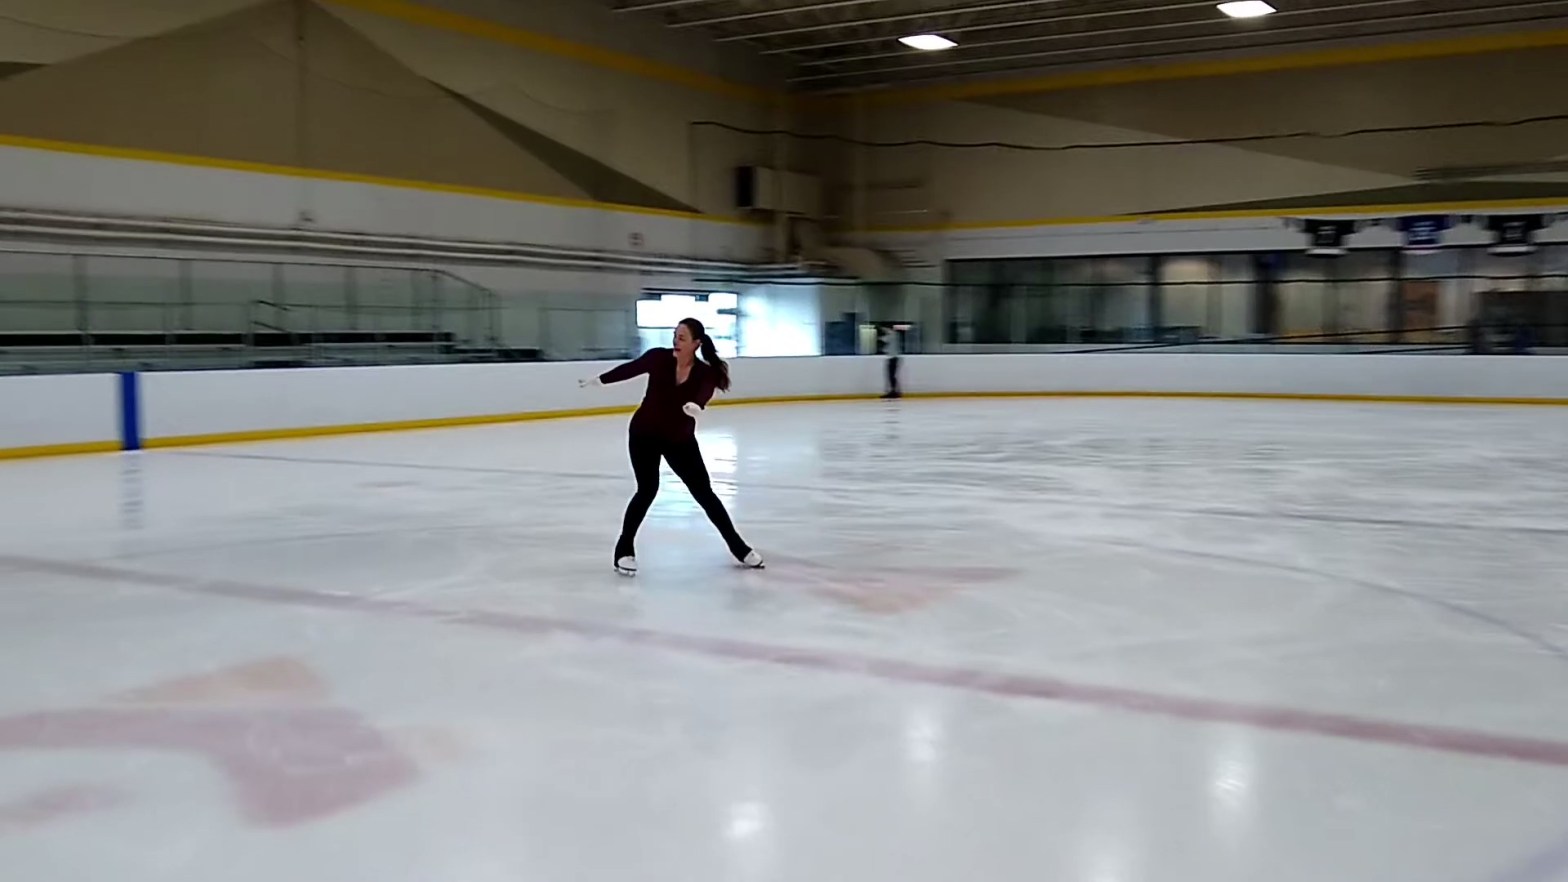
Now that the individual steps have been laid out, I will focus on the little details that allow the skater to truly make the most of the pattern, both as a warmup and as a choreographic sequence. The foundation necessary for skating a strong, powerful, and beautiful pattern is a stable skating position, comprised of both deep knee bend and proper posture. Proper posture is achieved by keeping the upper body and head in an upright, vertical position aligned over the bent knee. The skating position is completed by extending the free leg as much as the body allows, with the toes pointed. Deep knee bend and proper posture combine to create the stability necessary to generate power and push with each stroke, allowing the skater the control to execute the pattern’s steps on the correct edge of the blade and add finishing touches. By contrast, a common mistake is to bend forward at the waist and bend less at the knee, which creates two problems simultaneously: misalignment of the body and lack of power. The net result is that the skater is only able to walk through the steps in a nominal fashion, without having the control to skate the steps on the correct edge of the blade nor apply finishing touches.

I like the above photo because it captures a strong and stable skating position. Of note is the knee bend of the skating leg, with the upper body and head in proper alignment above the bent knee of the skating leg. The waist is strong and secure, with the only bend in the body occurring in the knee. The free leg is extended and straight.
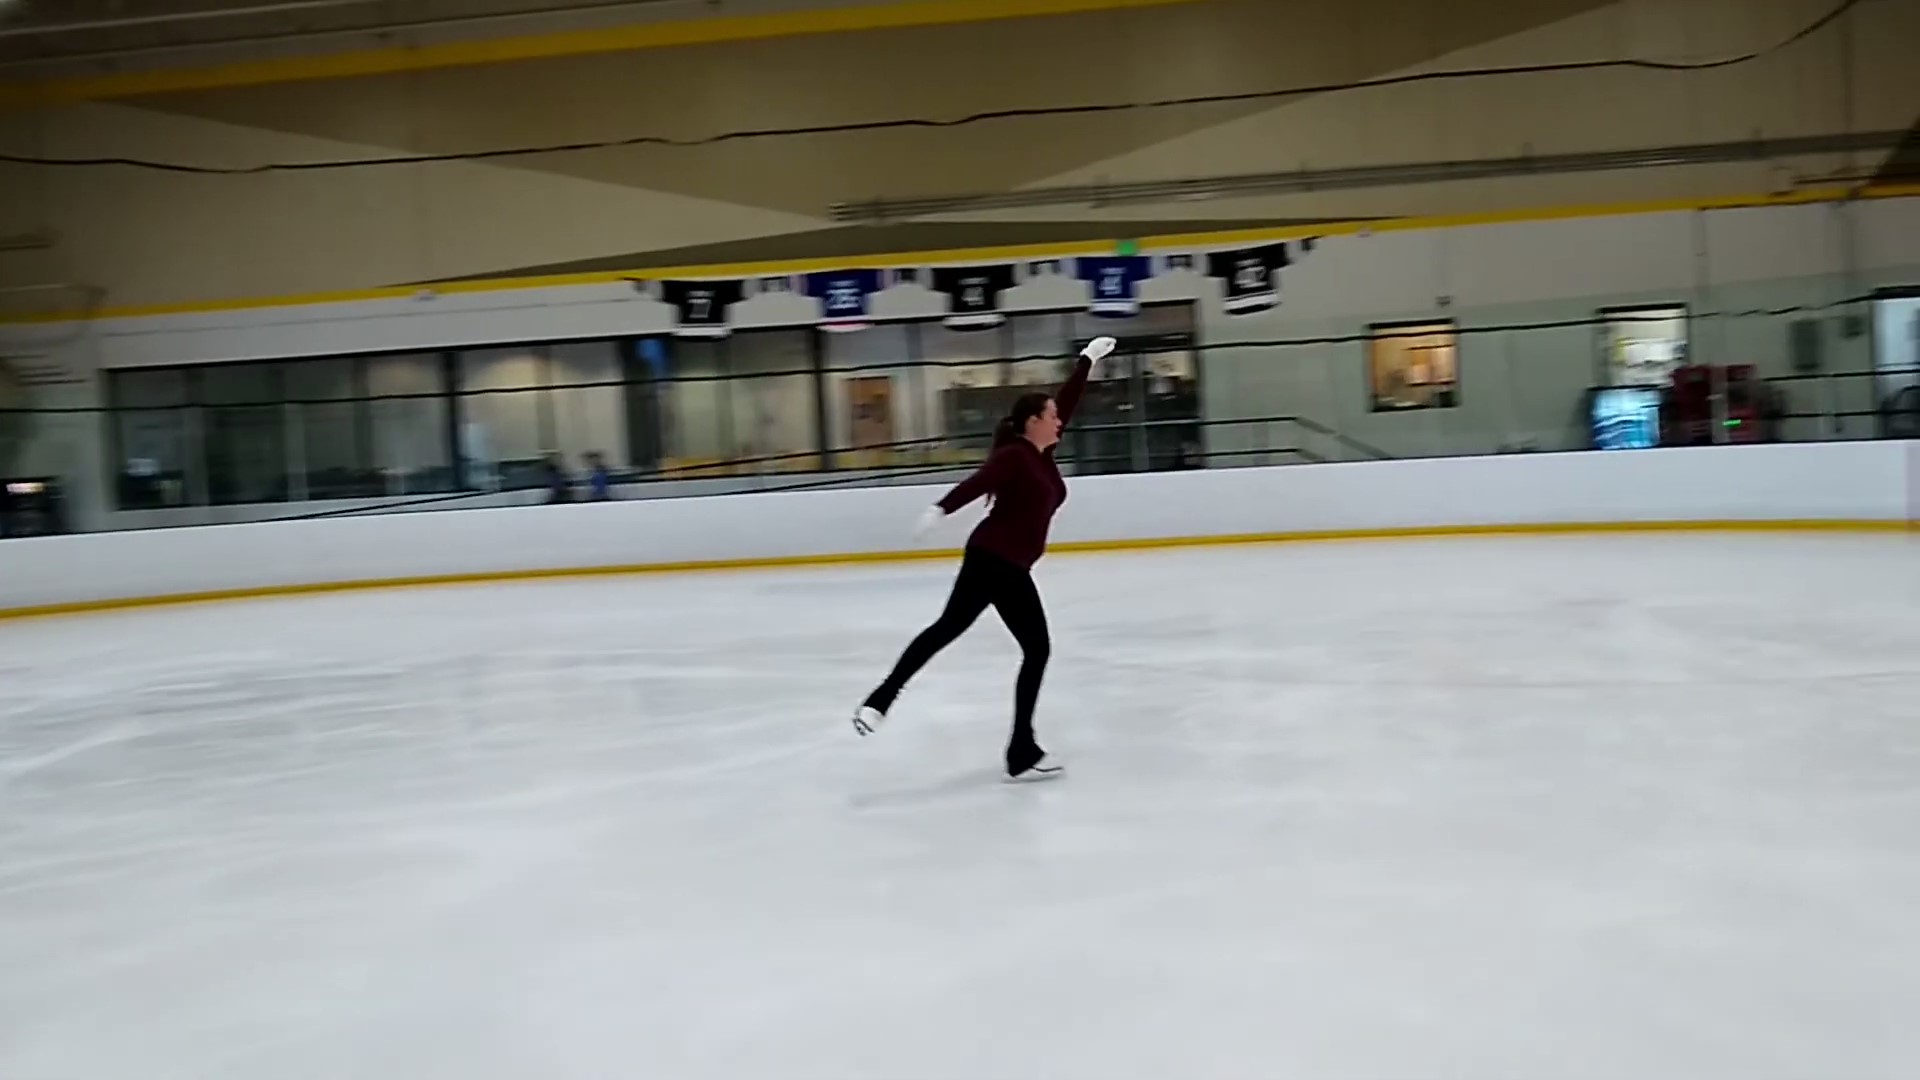
Once a strong and stable skating position is achieved, take advantage of the control you have to hone the pattern’s individual steps and add finishing touches. Use the first two crossovers of the pattern to generate speed and power. This will create more stability when stepping onto the left forward inside edge into the forward glide. Once in the glide, keeping the skating knee bent will make it easier to hold the the left forward inside edge (as opposed to slipping off the edge onto the flat of the blade) and allow for the addition of finishing touches. My preferred finishing touches are to extend the left arm above the head and gaze upward toward the tips of the fingers, all the while extending the free leg as much as possible. Not only do these touches create a beautiful appearance on the ice, they strengthen the warmup as well. Extending the arm above the head while gliding on a solid left forward inside edge allows for a great side-body stretch, and extending the free leg helps warm up the hip area.
After the forward glide on the left forward inside edge, the first change in skating direction in the pattern occurs with a mohawk turn followed by a side step wide onto the right backward inside edge. When executing the side step, be sure to shift the body weight to the right side of the body, so much so that the left leg is straight. The weight shift will allow for a secure right backward inside edge and will define and accentuate the step. For a finishing touch, I like to twist my upper body to the right and extend the right arm out toward the right side of the rink with the palm of my hand facing upward. I gaze beyond the fingertips of my right hand toward the right side of the rink, imagining that I am gazing at an audience seated in the bleachers. I hold the pose briefly for dramatic effect. Keeping the core muscles tight while holding the pose will make it appear stronger and more defined, as well as assist with the upper body twist to gaze at the audience.

The above photo captures the side step wide onto the right backward inside edge. The weight shift to the right side of the body is evident, as is the correct edge. This photo was taken shortly after I learned the Champion’s Lap so I was still in the process of discovering how to add finishing touches.
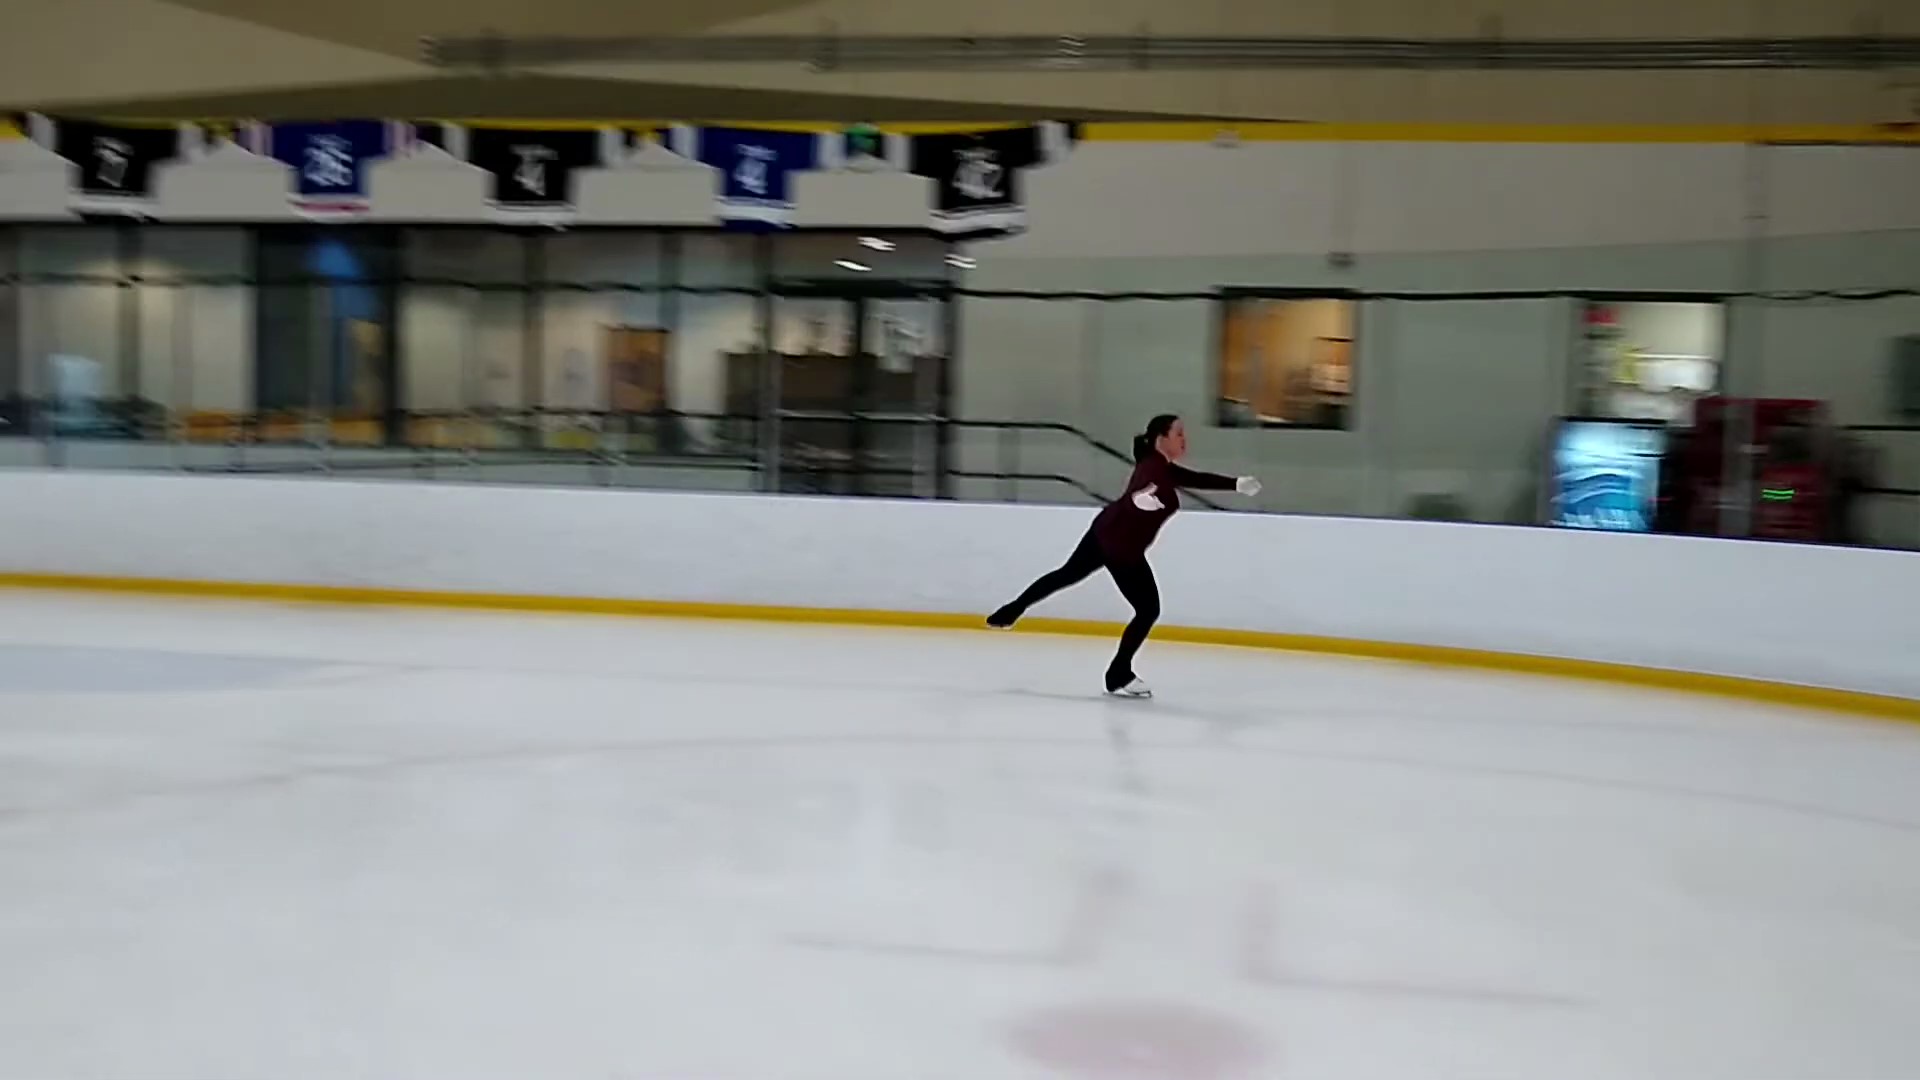
The aforementioned mohawk turn – side step wide sequence will send the skater toward the opposite side of the rink, allowing for greater ice coverage in the pattern. The next sequence in the pattern will return the skater to the side of the rink they started on. A strong right backward inside edge on the previously discussed side step wide will assist, as it will keep the skater on a half-circle lobe, naturally sending them back toward the side of the rink they started on. To return to that side, after holding the side step wide on the right backward inside edge, skate one backward crossover and then step forward onto a left forward outside edge, holding the edge for a brief glide. When skating the backward crossover, remember to shift the body weight from the right side of the body to the left, as opposed to simply dragging the the left foot over to the right before the right foot makes the cross step. The weight shift, when performed properly, will help maintain power throughout the remainder of the pattern. As always, proper body alignment is also key to skating this part of the pattern, as it will be required to make the step forward securely onto the left forward outside edge. The step can be challenging to execute because it requires the skater to change direction. Without proper body alignment, in other words, if the skater is bent at the waist and leaning forward (a common mistake), it becomes challenging to bring the feet together before making the step forward; the distance between both feet is simply too great. When this happens, the step forward has an awkward and unnatural look and feel and the skater may even risk falling. By contrast, when proper body alignment is maintained, the feet remain close together naturally, allowing the pattern to continue without missing a beat, appearing graceful, secure, and natural. And this strength of skating allows for finishing touches to occur. I like to hold the left arm above my head during the glide and gaze out toward the fingertips, which also provides another side-body stretch!
The above photo demonstrates the glide following the step forward onto the left forward outside edge. I could have a little more knee bend to allow for an even deeper edge, but proper edge and body alignment is demonstrated. And this forward glide, unlike the first forward glide, is on an outside edge. I like how the two forward glides in the pattern are on opposite edges, making for a more symmetrical and complete pattern.
Now, the final sequence of the pattern commences. From the glide on the left forward outside edge, skate a mohawk turn. You will now be facing backward. Next, skate two backward crossovers, and then finish the pattern in a jump landing position on a right backward outside edge, with the head looking toward the right. That’s it!
The above photo captures the landing position at the very end of the pattern. The right backward outside edge is evident, as is proper body alignment and posture. I did forget to look toward the right! Now, if you would like to continue the pattern up the other side of the rink, so as to complete one full lap, from the landing position turn to the left and step forward onto the left forward outside edge, glide for one or two counts, and skate one forward crossover. These steps should line the skater up to begin the pattern all over again.
One thing I love about the ending part of the pattern is its symmetry with the very beginning. At the very beginning, two forward crossovers are skated. At the very end, two backward crossovers are skated. This is of course in addition to the symmetry mentioned above with respect to the different edges on the two forward glides. The symmetry of the pattern helps make it a balanced choreographic sequence, not to mention fun to skate! And if you want to be even more symmetrical, the lap can be skated in the opposite direction (clockwise), in which case each of the individual steps would be the reverse. For example, the two forward glides would be skated on the right leg, the side step wide would be onto the left backward inside edge, etc.
I will end this post by discussing how I incorporate the Champion’s Lap into my figure skating practice. I have made it a part of my warmup routine every time that I skate. I also find it useful when I need a redirect in my practice, for example, when I’m working on an element that isn’t going well. When I find myself descending emotionally into a downward spiral, I skate a few Champion’s Laps to take my mind off what isn’t working. Skating the laps allows me the emotional space to find my center and restore a positive mindset. And the symmetry of the pattern applies a satisfying sense of balance and control to those seemingly out of control moments during practice. Lastly, skating laps is ideal if I need a brief bit of aerobic exercise on a day when I’m not expending much physical energy on the ice, for example, if I’m practicing turns over and over on a circle. The Champion’s Lap helps get the blood pumping and, when skated over and over, provides a full body workout.
Please subscribe to my blog by entering your email address below. It is an honor for me to share my experiences with you!
